Showing posts with label Speed Lights. Show all posts

Sunday, January 11, 2015

Fill Flash

    Fill flash is using your flash to fill in darker parts of your image already lit by other light. I like to use it for all my people photos outdoors as it makes for better, stronger images.

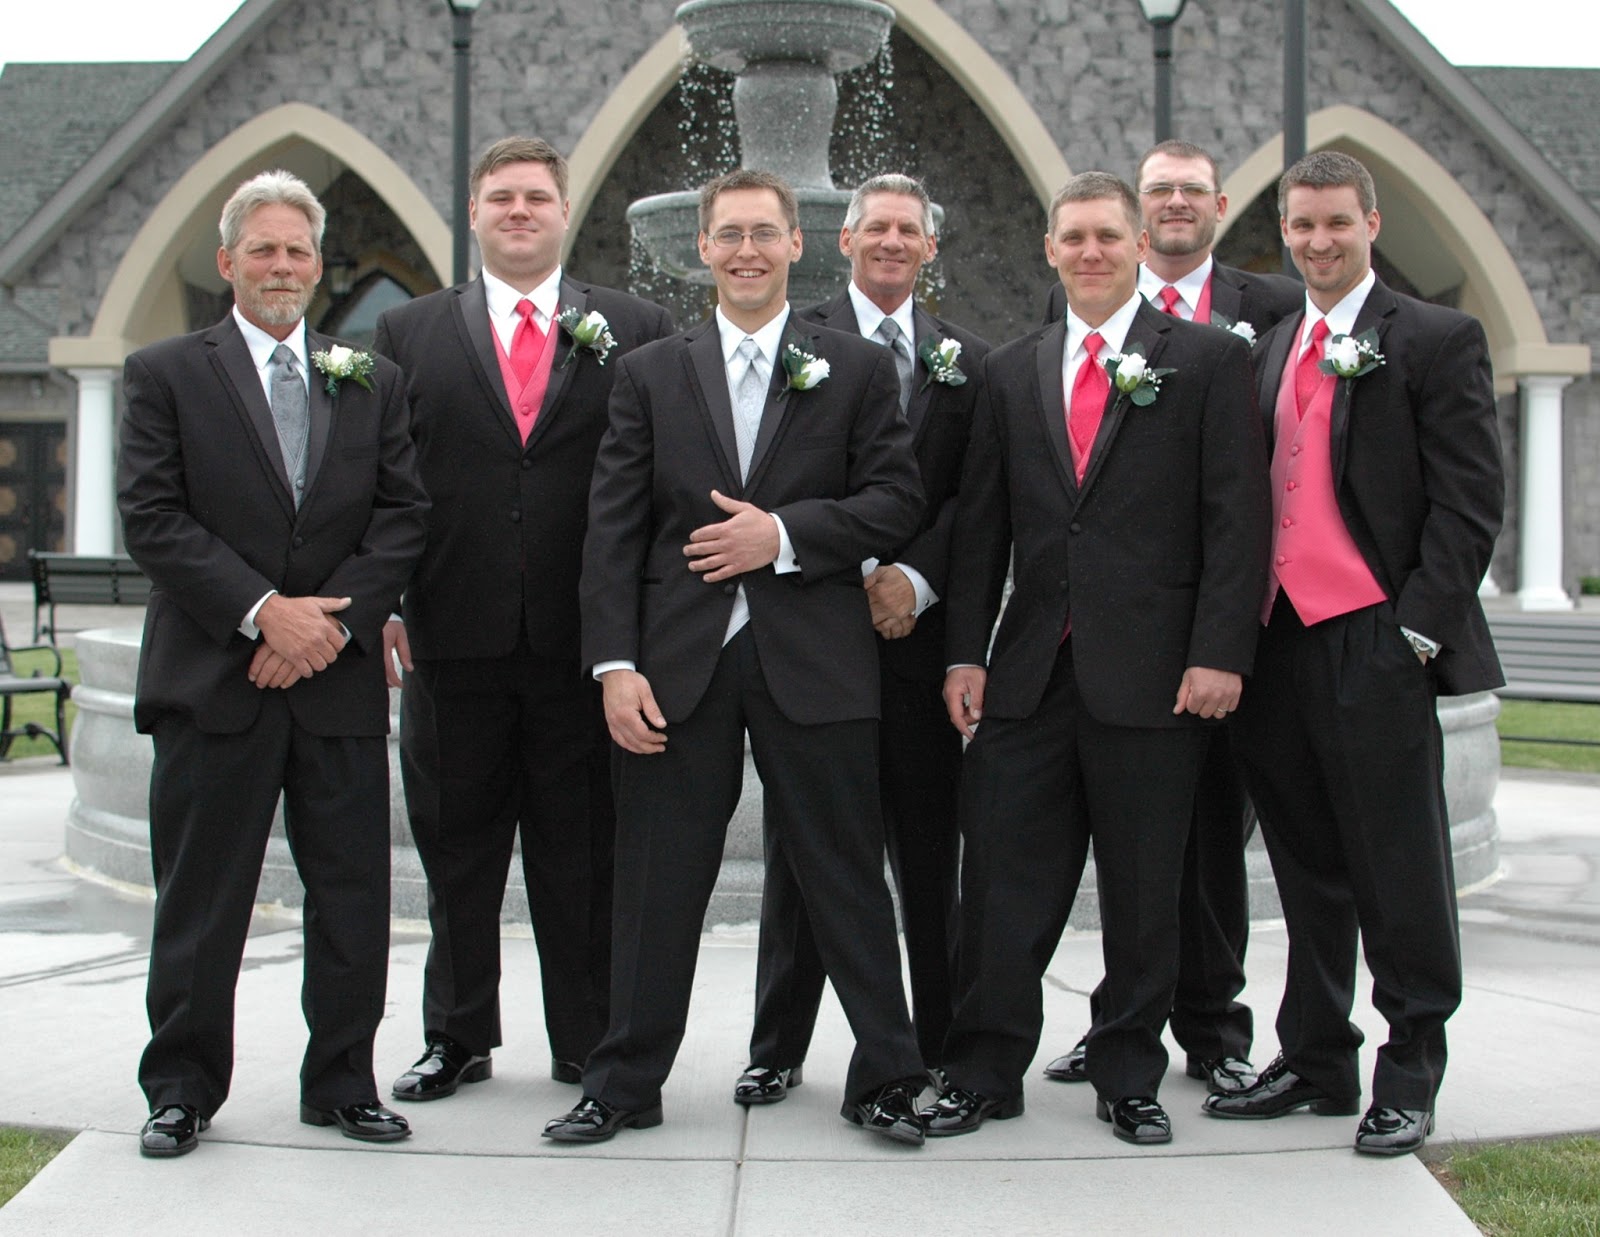
    Adding fill flash to your images is easy, just turn on your camera’s flash and automatically get the results shown here. You don’t need to fiddle with any settings; just press the Flash (bolt) icon button and your camera does all the rest of the work, no camera pops up the flash by itself, so you have to turn it on by yourself and the camera does the rest.

    When shooting outdoors, fill-flash lights up people’s faces so they aren’t drowned in shadows and also puts highlights in their eyes so they look alive. Additionally, fill-flash lightens shadows and adds details to darker areas, while preserving the highlights. When shooting in direct sunlight, fill flash helps to make your images better, especially when the subject is back lit.


                                                            No Fill

    Using an external Speedlight is better than using the pop up flash built into your camera, mostly because the add-on flash has more power, which means greater distance and more fill light for your images. I recommend the 430 EXII if you are a Canon user and the SB-400 if you are shooting Nikon as these are two of the best units for fill-flash and these units are less expensive than the SB-500 or 580EX II which generally run around $500-$600.

                                                          Fill-Flash

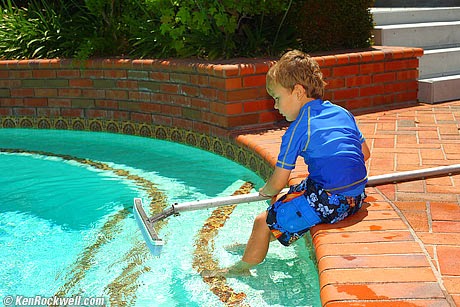
    Fill-flash also helps with making your colors render more vivid and natural. When shooting with the flash alone I often feel that the shots seem to have a blue tone to them, which is why I use either a slight orange gel or an orange flash diffuser to make the light warmer and the colors stand out better. To have more or less fill flash, use the +/- to increase or decrease the power output of the flash and alter the overall light, which in turn changes the way the image looks.

    One last thing to remember is when using fill flash, make sure you take your ISO off auto, especially if using the pop up flash as the camera will set the ISO to the lowest setting, which means if you are shooting indoors, it will be too low.
Comments/Questions

Wednesday, September 18, 2013

Where Should I Shop for Cameras and Equipment to Get the Best Deals?

Where’s the best place to buy a camera or other photo equipment? With so many options now, how is someone supposed to know where to start?

Obviously when you start shopping you should check out options and prices on the internet. Now be careful when you are looking at a particular product, be it a camera, lens, or other photography equipment, that you know what you are getting. When I bought my Canon 5D Mark II, I found sites that offered Canon 5D Mark II at really low prices, from Asia. They are call “knock off” products for a reason. They tell you they are the same, but the quality is usually lower AND (important point) there is no manufacturer’s warranty from Canon.  So Lesson 1: Make sure you know what is being sold. 

Lesson 2: Purchase from a reputable dealer. You CAN get great deals online. I purchased my camera used through Amazon.com. It actually was being sold by a pawn shop out west. It was an amazing deal. Because it was through Amazon, I had their guarantee policy. So as soon as it arrived, I tested the entire camera out and found that there was a row of dead pixels in the sensor. I contacted the seller and told them I would either return the camera, or they could pay for the repair work to be done by Canon. They agreed to pay for the repair work, which was $250 dollars. (Actually they credited the $250 back to me and I paid Canon). BINGO! I had a perfect camera totally repaired and certified by Canon. I only paid $1500 for the camera body including the repair. I already had Canon DSLRs so my lenses transferred to the new camera.

I almost always check Amazon first when looking for camera and accessories because most of the major camera equipment stores sell through them, and may offer better deals through Amazon than on their own websites such as B&H or Adorama. When you look at something on Amazon, see where it is being sold from. If you look up an L-series 24-70mm lens today, there are a bunch of used ones being sold from Japan. I’d stick with stateside purchases. Check out some used dealers also. One I trust is KEH.com. Also check in Rangefinder or Professional Photographer magazines for dealers.

Lesson 3: Get great deals at trade shows at the national photography conferences. When I attended the WPPI convention a couple years ago, I spent a lot of time at the trade show. I learned a lot and made some great vendor connections I’m still using today. I also found fantastic deals, most which were good for 30-60 days after the convention. This is how I bought my Westcott studio light package. I saved about 50% of the total retail cost. I also purchased template software for albums, photo collages, and marketing materials for a fraction of the normal cost. Beside all the valuable training and classes and interaction with great photographers, I was able to make great purchases, and plan for future purchases. (It was at the Canon booth that I learned that I wanted a 5D Mark II and L-series lenses to regain the quality I lot switching from medium format film to digital. So when I was ready to purchase, I could spend time looking for a great deal.)

The most important thing to remember when making photography equipment purchases is (Lesson 4) that YOU are the most important piece of equipment that will determine how your images turn out. Save BEFORE and buy when you can pay cash. While you are learning, you don’t have to have the best equipment. Learn to use what you have now to make great images. Then when you can afford to upgrade, you will be that much further ahead. 

Sunday, July 21, 2013

Good Morning from your Sunday Ambassador. My name is Wayne, I am currently enrolled in the BS Photography program.  I hope you are all staying cool from this heat wave. There are many different areas of photography, as there are many wonderful photographer's. One of my favorite subjects to photograph are weddings. This is a face paced environment and you don't always have the time to set up and get that "spectacular" image. I have worked with some great photographers who's idea was quantity not quality. So by the end of an 8 hour wedding they may have 3000 images, but many are unusable. Use your available ambient light, and always shoot in manual.

When photographing a wedding it is very vital that you know your equipment. This includes your camera, speed lights, strobes, remote triggers, reflectors and soft boxes. Try not to rush your images, take your time so that you can create those long lasting memories for your clients. Furthermore, know the advantages of shooting in manual mode vs. shooting in auto or one of the presets. Manual allows you, as a photographer to create the photograph and not allow the camera to decide what the final image looks like.

When photographing, I always shoot in RAW instead of JPG because RAW will capture all the data in the image with minimal compression. This allows for easier post production.

Below are some photographs from two recent weddings. Please feel free to ask questions and leave feedback.

                                                         Flash Mob Photography Network - Wayne Salat
   Flash Mob Photography Network - Wayne Salat
                                                       Flash Mob Photography Network  - Wayne Salat
                                                          Flash Mob Photography Network - Wayne Salat