Showing posts with label Photography Tips. Show all posts

Sunday, April 12, 2015

Carry Less, Shoot More

Back when I started in photography, I bought lots of gear and started out carrying most of it with me when I went out all day shooting. Many photographers do this and soon learn that it’s not fun carrying all that gear all day long out in the field. Most of the components of your DSLR system weigh mere ounces to a couple pounds and it may not sound like a lot of weight but when you have ALL of it in a bag or backpack, it’s amazing how heavy it all becomes as the day wears on.

Golf ball in my flower bed shot with 50mm

I now try to minimize what I carry when out in the field all day long so I can carry less weight and shoot more. Another advantage of carrying less aside from going on a camera diet is it is a great way to challenge yourself to be more creative with what you have on you. When carrying all your gear, you tens to spend less time shooting and more time fiddling with lenses and it becomes difficult to focus on shooting as you have a hard time visualizing on what you want to shoot and how to frame it.

If I am going out to just shoot all day I want a good, light weight set up that I can shoot a variety of scenes with and I often find myself grabbing my Canon EF 50mm F/1.4 USM also known as the Nifty Fifty. For me the body doesn’t really matter as all my bodies but one are Canon and I can even use my Canon lenses on my Sony NEX 6 as I have the Canon to Sony adapter.

Atlanta diner owner shot with 50mm

I like the Nifty Fifty set up as 50mm focal length is one of the most popular and most versatile lens out there. It’s great for street photography, portraits, and even landscapes, although it’s not as wide as my EF 17-40mm or my Sony 16-50mm.

Another reason I love the Nifty Fifty is it’s low weight of only 10.23 ounces. My Canon EOS 5 & 6Ds weight close to the same at around 27 ounces, so I keep my total weight to around 3 pounds total. Couple this with my new PeakDesign CapturePRO camera clip mounting system and I can be on my feet all day long with no issues.

Street photography downtown ATL shot with 50mm

 The next reason I recommend carrying less is so that you can become better with one set up. You don’t want to be out in the field worrying about changing lenses, risking getting dust on your sensor and trying to make up your mind what lens will give you the shot you want and then you miss the shot totally. By carrying a simple set up, you perfect your skills using what you have with you. You don’t need to have that zoom lens with you, get closer to what you want to shoot. This not only makes you more creative and builds your skills but you will find that you will enjoy your photography more and do less thinking or over thinking and as a result, less missing the shot. It’s also great when using a lens like the 50mm as you move around more and get more exercise. Who would have thought you could do something you love like photography all day and lose weight and become more fit at the same time. Now get out there and make some great pictures.

Comments/Questions

Sunday, July 28, 2013

Lighting Class

Happy Sunday Everyone!!  I hope you enjoyed the past week. Today I wanted to talk a little about lighting. In the past I was always afraid to use studio lighting, I found it intimidating and difficult to do. Over the years I have tried and tried to figure out studio lighting. I just never seemed to be able to get it right. So when I saw what my next class was that was coming up I was really excited. The class was PH136 Lighting class.  As I went through the course outline, I looked to see who my instructor was going to be. I found out that my instructor was Reuben Njaa, so I did what we all do nowadays, I “Googled” him. What I found was someone who was amazing with painting with light, and he appeared to have so much knowledge and this really excited me. I looked over his personal website http://www.reubennjaaphotography.com/ for hours, looking at all of his amazing work.

When shooting portraits remember that there are many different types of lighting. Each will give you a different result.(Hurter)

Split Lighting – is used when the key light illuminates only half the face. It is an ideal slimming light. It can be used to narrow a wide face or nose.(Hurter)

Rembrandt Lighting - is characterized by a small, triangular highlight on the shadowed cheek of the subject. This type of lighting is dramatic.(Hurter)

Butterfly Lighting - lighting pattern that produces a symmetrical, butterfly-like shadow beneath the subject’s nose. It tends to emphasize high cheekbones and good skin.(Hurter)

Rim Lighting - is used when the subject’s head is turned 90 degrees from the camera lens. It is a dramatic style of lighting used to accent elegant features. It is used less frequently now than in the past, but it still produces a stylish portrait.(Hurter)

Loop Lighting - This is one of the more commonly used lighting setups and is ideal for people with average, oval-shaped faces.  (Hurter)

One of the things that I remember that stands out the most is one of my first interactions with him. Our first assignment we had to post a Bio, and as the comments flowed, I had told him” I want to be just as good as you are!” His reply not only surprised me but has to this day inspired me. Reuben Njaa said this” Don’t try to be as good as me, try to be better than me”.  I keep that in the back of my head each and every time I shoot.  Thanks Reuben you have been a true inspiration.
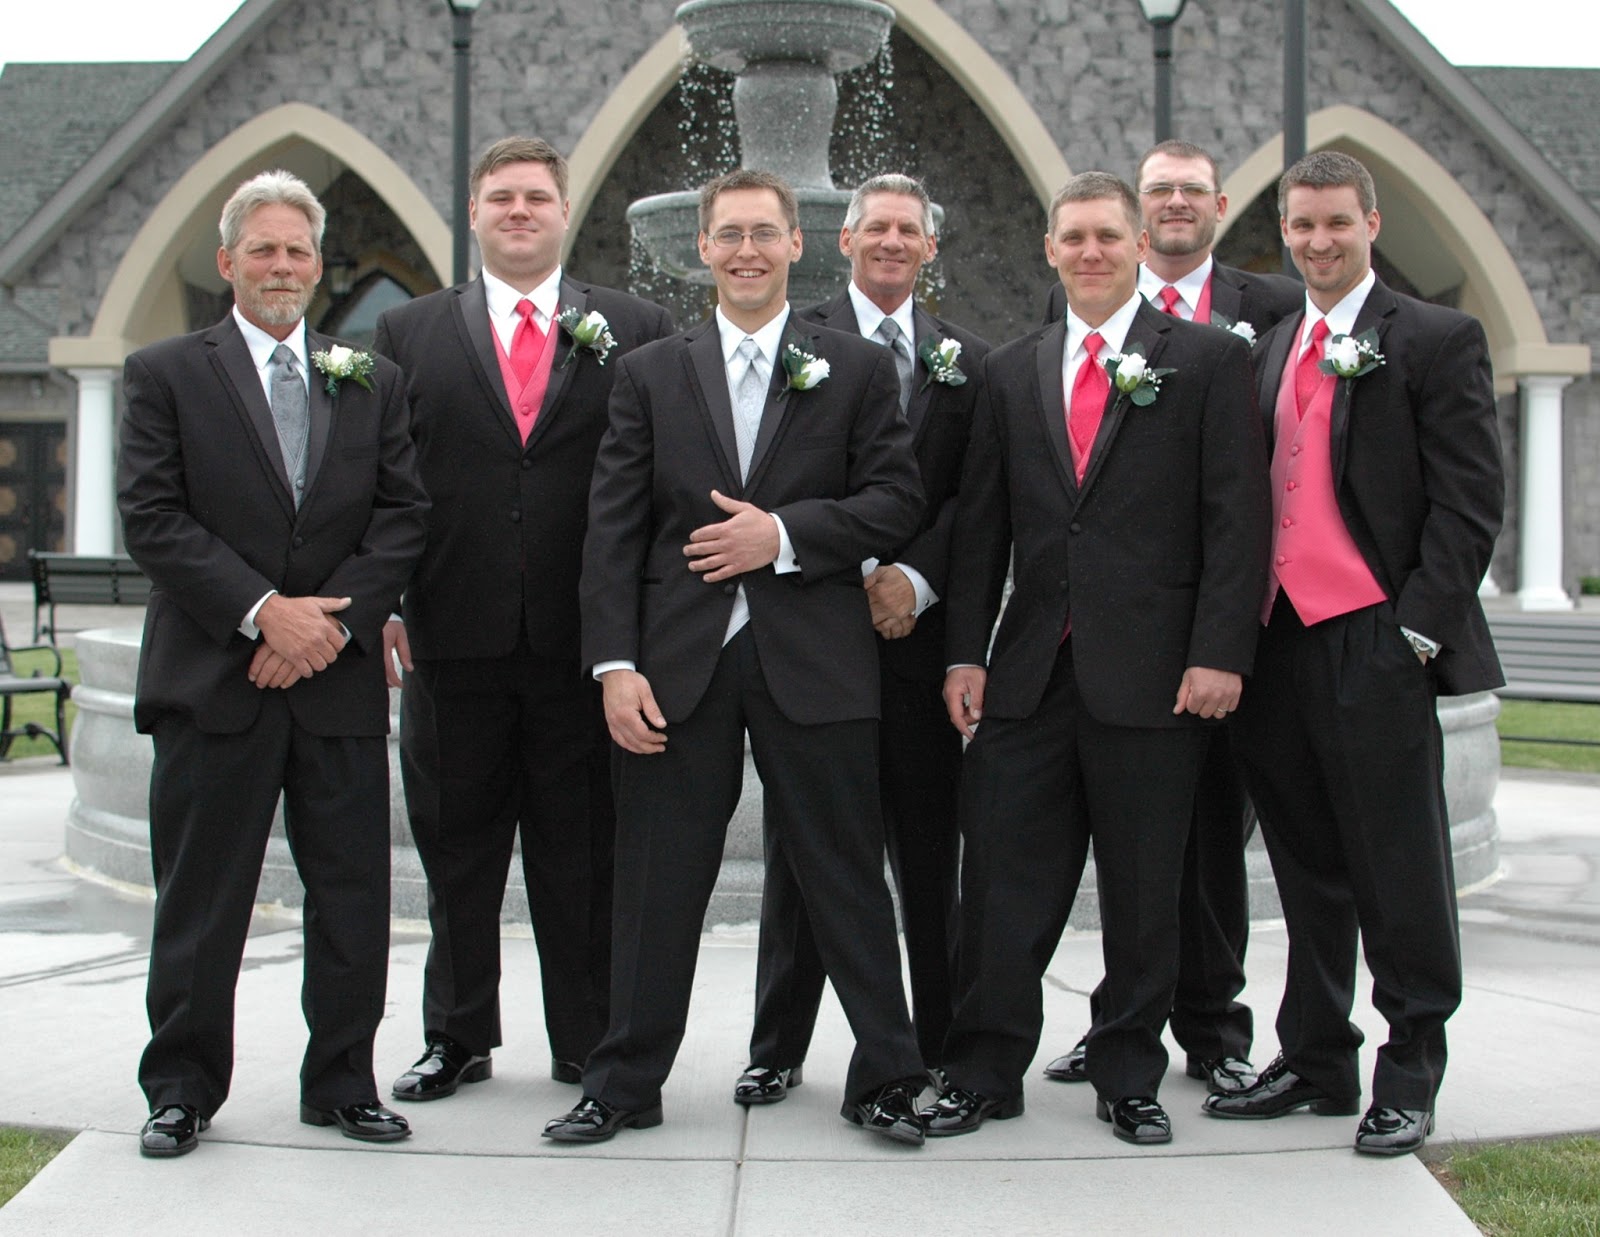
Below are a few of the photographs I took during PH136 with Reuben Njaa


 Photos by Wayne Salat
  Photos by Wayne Salat
  Photos by Wayne Salat
  Photos by Wayne Salat
 Photos by Wayne Salat


Enjoy Your Sunday and Photograph Something Everyday!

Sunday Ambassador~ Wayne


Hurter, Bill. "The Five Basic Portrait-Lighting Setups." Sekonic Control Light. Sekonic, n.d. Web. 23 Jul 2013. <http://www.sekonic.com/whatisyourspecialty/photographer/articles/the-five-basic-portrait-lighting-setups.asp&xgt;.

Sunday, July 21, 2013

Good Morning from your Sunday Ambassador. My name is Wayne, I am currently enrolled in the BS Photography program.  I hope you are all staying cool from this heat wave. There are many different areas of photography, as there are many wonderful photographer's. One of my favorite subjects to photograph are weddings. This is a face paced environment and you don't always have the time to set up and get that "spectacular" image. I have worked with some great photographers who's idea was quantity not quality. So by the end of an 8 hour wedding they may have 3000 images, but many are unusable. Use your available ambient light, and always shoot in manual.

When photographing a wedding it is very vital that you know your equipment. This includes your camera, speed lights, strobes, remote triggers, reflectors and soft boxes. Try not to rush your images, take your time so that you can create those long lasting memories for your clients. Furthermore, know the advantages of shooting in manual mode vs. shooting in auto or one of the presets. Manual allows you, as a photographer to create the photograph and not allow the camera to decide what the final image looks like.

When photographing, I always shoot in RAW instead of JPG because RAW will capture all the data in the image with minimal compression. This allows for easier post production.

Below are some photographs from two recent weddings. Please feel free to ask questions and leave feedback.

                                                         Flash Mob Photography Network - Wayne Salat
   Flash Mob Photography Network - Wayne Salat
                                                       Flash Mob Photography Network  - Wayne Salat
                                                          Flash Mob Photography Network - Wayne Salat

Thursday, July 18, 2013

What Do You Want to Be When You Grow Up?

Good Thursday Morning from your Thursday Ambassador. It is a great day today. I get a private session to photography a Frank Lloyd Wright house today! This came about because I am a student at the Art Institute of Pittsburgh Online Division. Be glad you are a student too!

THEN  and  NOW
When I was a child I thought about being a great pianist. I even dreamed getting married in a field of yellow daisies with a grand piano there. Funny, I pictured the field and piano but not much of the wedding. J I did go to college immediately after high school and major in piano performance, but the degree I got was my Mrs. not a bachelors.  I spent the next 20 years supporting my husband’s pastoral ministry with my music ministry. Now he is encouraging me to get my degree.

Along my married journey I also met and fell in love with photography. Once I picked up a camera (actually I was given two Mamiya 645s) and started capturing emotions of people, I was hooked. That was back in the mid-1990s. Ever since people have been asking me to photograph them. I wanted to learn as much as I could so I went to as many photography seminars as I could and I turned into a good photographer. I kept telling my husband, and growing children, that as soon as I wasn’t needed to raise our kids, I was going back to college to get that degree I stopped a year short of. About 2005 that dream was drawing close enough to start thinking seriously about what do I want to be when I grow up? I didn’t see my music going anywhere it wasn’t already being used, so it seemed futile to finish a music degree. I was working as a part-time freelance photographer, and absolutely loving it, so this made a lot more sense.

THEN  and  NOW
THEN (top)  and  NOW
I contacted the local colleges and universities (because I couldn’t relocate to go to school) but none of them offered a photography program that would have been as in-depth as what I already had experienced. That is when I found AIPOD. I looked for a school that would not only give me the degree I wanted, but help me move from being a good photographer to a great photographer. I planned to, and have, put in 100% effort to get to that place. I have also pursued learning outside the classroom. I take advantage of photography classes taught by master photographers. I took a week long Master Class taught by Clay Blackmore and David Ziser that really cemented my ability and confidence to properly light and pose my subjects. I take in as many CreativeLIVE trainings as I can (because you can watch them free online-and ask questions live when they are videoing them). You can see 3 days of Pose It, Light It, Love It with Clay Blackmore July 29-31. Just sign up free at CreativeLIVE.com. Today I'm starting one on High Volume Photography Business. 

Before I started AIPOD I rarely practiced my photography outside an actual shoot. Now I understand the reason to practice over and over. Even if I can accomplish my goal on the first try, I gain confidence and streamline my process each time I accomplish it again. This creates a confidence in me, which will also create confidence in my clients as they see me work. So now that I have only 3 months left to complete my bachelors in photography, I can look back and see a huge difference in my photography, my confidence level, and my ability to run my business successfully.


So what is your story…and what do you want to be when you grow up? Share it with us.

Sunday, July 7, 2013

The Wrong Perspective!

Have you ever experienced a time when you just couldn’t deal with someone? You couldn’t come up with any reasonable explanation or solution for what was happening. Then someone tells you to think in a different way. “Look at it from his perspective,” they say to you.

When we photograph tall object, like buildings, we can run into a similar situation. It looks right to us when we look at it with our eyes, but when we photograph it, we get the wrong perspective. The buildings look wrong.

Thankfully, there is a solution for this problem in Photoshop. You can transform a distorted building with Perspective.  

If you have never used the Transform commands (on the Edit tab) then it might be helpful to check out this video from Adobe. This is just a general overview of the transform options, but it will give you lots of ideas.


Looking at some images taken last week of very tall buildings, you can see that they look distorted. It is easy to manipulate them just enough to get the right perspective for our human eyes.


So, go find something really tall and take shots of it that make it look distorted. Then go into Photoshop, create a new layer, and play with the new layer using Edit/Transform/Perspective and see what you create.

Wednesday, July 3, 2013

Big Bang Boom! Fireworks Photo Tips

Photograph by Mike Theiss, National Geographic


In honor of tomorrow's Independence Day celebration, here are a few tips to help you take some fantastic fireworks images:

1. Shoot in Manual Mode!  For fireworks you need to have the greatest control over your camera settings.  Start out at ISO 100, f/11, and 1/2 sec exposure.  Once you have taken a couple of pictures then you can adjust you shutter speed as necessary to get the shots you want.

2.  Focus!  Make sure you set you focus manually before shooting.  Once the pyrotechnic show starts your camera's built in autofocus will not be able to find a contrasting edge to focus on (unless you get lucky).  Find something in the sky or something on the ground that is the same distance away as the fireworks will be.  Once you have set it using manual focus, leave it there and fire away.

3.  Use a tripod!  The slow shutter speeds required to capture amazing shots on July 4th means your camera needs to be stabilized.  If you have an external cable release that will also help reduce camera shake giving you nice clean images.

4.  Check you environment!  Take a look at your surroundings before you start shooting to see what interesting elements there are in the foreground of your images.  Use those natural features to frame your composition.  If you are in a city location, use the city skyline as a backdrop.  And don't forget to keep your horizon line straight.

Well this should get you off on the right foot to start taking fantastic images during your local fireworks shows.  Once you're finished shooting post some of your new images up on the PSPN Google+ page.  I would love to see how they turned out.

Theiss, Mike. "Fireworks, St. Louis." National Geographic. National Geographic Society, n.d. Web. 3 July 2013.      <http://photography.nationalgeographic.com/photography/photo-tips/photographing-fireworks/#/fireworks-st-louis_37118_600x450.jpg>.