Showing posts with label Perspective. Show all posts

Sunday, August 23, 2015

Using Perspective for Better Images

One of the things that new photographers struggle with is shooting everything at eye level. You walk around taking in the scenery and see something that catches your eye and just point your camera at it and shoot. The problem is this can make your photos bland and boring and everything starts looking the same.

In order to make things for interesting and visually appealing, you need to move around and change things up a bit. Shooting a field of flowers with a windmill in the background? Use a wide angle lens and get down low to the ground, that way the flowers in your foreground are more prominent.

If you are shooting a redwood, get down low and shoot looking up into the tree, it will exaggerate it’s massive size even more and create a more interesting view. Or if it’s a small object like this antique Singer sewing machine, shoot standing over it and shoot downwards.
I shot this sewing machine by getting close and then looking down into it.
You can also shoot buildings or cars at an angle to get more of a unique look to them. I sometimes shoot my buildings for my project at the corner of the building just to make the scene more interesting and if the sky happens to also be really dramatic naturally it can make your image stronger.
For this Impala SS, I got down low and shot it at an angle from the front.
Great photographers never just stand and shoot everything at eye or tripod level, they move around and mix things up a bit to make for more appealing images. One of my favorites, Chase Jarvis, shoots a lot of sports, especially cyclists, snowboarders, rock climbers and he is always thinking outside the box on the view, angle and perspective he wants to get for his images.

I watched one of his shoots he was doing for Mountain Dew, and he was shooting a guy riding on a trail out in the woods and to get the perspective he wanted, Chase and his team made a dirt mount for the rider to go over and get airborne and then Chase actually laid on the ground on his back and shot up into the rider and bicycle to get a better angle to make the kind of strong image he was looking for. Now in a case like this, he could have potentially gotten hurt if something went wrong, but Chase doesn’t worry about stuff like that, he worries about getting the angle and view he is looking for to make that strong, visually appealing image and the folks at Mountain Dew loved that image and plastered it all over billboards, magazines, etc.

For this steam powered saw, I knelt down and got in close to make the blade bigger.
So keep these tips in mind next time you are out shooting. Change things up, make your images more compelling and more interesting. You will get much more dramatic and beautiful shots, and won’t have your professors nagging you to move around and make more visual variety!

Comments/Questions

Wednesday, December 18, 2013

Wide-Angle Wednesday

Good Morning PSPN and Welcome to Wide-Angle Wednesday!

My name is Corina and I’m a student studying in the BS Photography program. I just recently celebrated my first year at AI and look forward to blogging all about my experience and everything photography right here every Wednesday.

Why call it “Wide-Angle” Wednesday? Because “Hump Day” is over rated...dang camel!

Let’s see, a wide angle lens serves a purpose in two ways
  • ·        Gives you a wide angle of view
  • ·     Shorter focal length
The goal in blogging here at PSPN is to provide that wide-angle view in both our course study and our love for photography. It’s an opportunity to add emphasis and detail to your foreground studies, as you capture and hone your skills in the background. A shorter focal length is not a bad thing; it represents your passion to be up close and personal to your studies.

Take advantage of Wide Angle Perspective!

example of exaggerated wide-angle perspective

We have a wide angle view meaning objects up close will seem bigger in size than that of the background. Naturally in life, our short term goals are in the foreground and the long term goals fall into the background. We all strive to meet our long term goals but we can’t achieve perspective without the short term being upfront and completed first.  

So where am I going with the photography, wide angle lens lingo on a Wednesday?

Well I like to make comparisons and normally when I do, I use something recognizable to the audience. I’m also an inspiring landscape photographer, with a side of journalism. As photographers we may take a second or two to determine what lens we need, lighting, accessories, and settings we plan to use to capture the image. Sometimes the outcome is awesome, other times the outcome is a shot being missed. Let your time here be that awesome shot, in other words take more than a second to determine what you need as you go forward in learning new skills.   

We have all heard the saying “cross your t’s and dot your i’s”. I like to take it one step further and say don’t forget to capitalize your Education Opportunities and don’t let the assignment be the period to the end of practicing your new skills.


My photography inspiration comes from growing up in the Yosemite Valley in California. Anyone from the area has probably seen the works of Ansel Adams a thousand times over. At some point I thought an awesome job in life would be a Forest Ranger. Little did I know I would fall in love with the art, and the history behind the images. I still have a passion for the environment and being outdoors, I just rather wear a camera than a uniform. Below is a quote also well-known and used a lot in the photography world.
"You don’t make a photograph just with a camera. You bring to the act of photography all the pictures you have seen, the books you have read, the music you have heard, the people you have loved.” –Ansel Adams
In closing, let your path in photography be wide angled. Stay focused and your path will be filled with perfect shots. 

I look forward to next week's Wide-Angle Wednesday as it’s Christmas! Good day to capture memories and eat some good food.

From my camera to yours, may all your images tell a story!
The Wednesday Ambassador

Saturday, November 9, 2013

The Art of Architecture (and why it is imortant)


Saturday Ambassador

I enjoy architecture for all its myriad details, the complexity of its engineering and the art form that it presents. I also enjoy photographing it; however, architecture presents a special challenge in this regard:
Hayden Ferry Lakeside Building, Tempe, Arizona, Deva Mayorga-Malone, 2013
It is imperative that the vertical lines of a structure remain straight in order to provide an accurate representation. Also, this is the way we perceive architecture after our brains automatically correct the distortion caused by perspective. Your camera, however, makes no such correction on its own. When you tilt the camera back to look up at a tall structure, a "key-stoning" effect is the result:
Hayden Ferry Lakeside Building, Tempe, Arizona, Deva Mayorga-Malone, 2013
You can use this to aesthetic advantage with symmetrical compositions which highlight architectural details and exaggerate the height of the structure, though usually a more precise approach is preferred.


Hayden Ferry Lakeside Building, Tempe, Arizona, Deva Mayorga-Malone, 2013
There are a number of ways in which this may be accomplished: Traditionally, architectural photographers often shoot large format with a camera which allows movement of the lens in relation to the film or sensor plane. However, tilt/shift lenses for the DSLR are becoming more common. They achieve the same purpose, in a more practical (and affordable) manner. For the rest of us, perspective correction must be achieved with software. Both Lightroom and Photoshop have excellent tools for this:
·         Lightroom: In the Develop Module, scroll down to Lens Correction and select Manual. There are sliders for distortion, vertical, horizontal, rotate and scale.
 
·         Photoshop: Under Filters, select Lens Correction, then the Custom tab. Here, you will find essentially the same options.
The effective use of these tools requires some practice, along with minute and careful adjustments. The end result, however, can be stunning:
Hayden Ferry Lakeside Building, Tempe, Arizona, Deva Mayorga-Malone, 2013
As an industrial photographer, the ability to shoot architecture is important to me. However, regardless of your genre, it can be a handy skill. For example, portrait and fashion photographers often pose their subjects in an architectural environment, and commercial shooters regularly photograph within interior architectural spaces. Regardless of your intended path as a photographer, honing these techniques can only prove beneficial.
Oh, and don’t forget the details:
Hayden Ferry Lakeside Building, Tempe, Arizona, Deva Mayorga-Malone, 2013

~Saturday Ambassador
 

Saturday, July 20, 2013

Photographing Nature


Saturday Ambassador

Most photographers develop a preference with regard to genre, style and subject matter which defines their professional existence. However, many choose to experiment in other realms for personal enjoyment, as well. Such explorations can be very educational, as a photographer can assimilate a host of new techniques and approaches into their repertoire. This can engender innovation and inspiration, as well as honing existing skills.
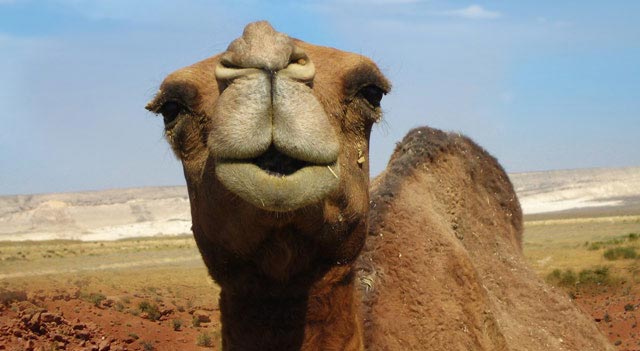
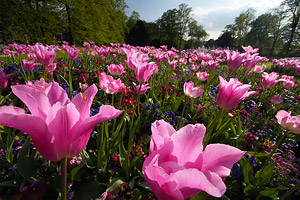
Nature is all around us, even in an urban environment, and is often a good place to start.  You might take a trip to an interesting location, visit the local botanical gardens or zoo, go to a park in your area or spend some time in your own garden. Flowers, rocks, water, storms, sunsets, clouds and insects can contribute to some exquisite natural imagery.
               Summer Storm over Antelope Island, Lake Powell, Utah, Deva Mayorga-Malone, 2013, panoramic composite
 
Photographing nature is an exceptional way to learn to mix artificial light with natural light, capture subjects in motion, expose for a broad dynamic range and develop the patience and eye for detail that are fundamental aspects of the art.
Here are a few suggestions for producing great photographs of the natural world:
§  Perspective: Humans most often view the world from a standing position and, subsequently, look down at things such as flowers and small animals. Consider shooting subjects like these from their level or from below for a unique look.
 
§  Composition: When you are attracted to a scene, you probably stop to photograph it. Don't move on too quickly, however, as your first impression may not be the only or even the most interesting composition. Walk around your subject and study it from various angles. When framing the shot, consider angles (diagonals can add depth to an image), direction of light/shadows, background/foreground, distracting elements, et cetera.
 
§  Lens choice: Selecting the lens best suited to your subject will naturally produce the best images. Consider how close you should be to your subject and how much of the back- and foreground you intend to include and decide accordingly.
 
§  Depth of field: Landscapes often benefit from a narrow aperture, such as f/16. However, a wide aperture like f/4 or lower can separate a subject from the background nicely by creating a background blur.
 
§  Light: As photographers, we are generally attracted to exceptional natural light and endeavor to use it to our advantage. Great subjects do not always reside within that fabulous light, however, or may benefit from the addition of supplementary artificial light. Electronic flash or a reflector can often accentuate a subject or provide fill light where required. Get your flash off the camera by attaching a synch cord or using a flash trigger. The unit can then be held (or mounted atop a light stand) away from the lens axis to light the scene in an attractive manner.
 
§  Details: Don't forget the details! Often, texture or pattern, a reflection or some minute component of the subject may be of interest in itself. It is worth exploring these additional aspects of the subject matter for the artistic potential they hold.
 
             Exquisite Sandstone Formation, Lake Powell, Utah, Deva Mayorga-Malone, 2013, digital photograph

~Saturday Ambassador

Sunday, July 7, 2013

The Wrong Perspective!

Have you ever experienced a time when you just couldn’t deal with someone? You couldn’t come up with any reasonable explanation or solution for what was happening. Then someone tells you to think in a different way. “Look at it from his perspective,” they say to you.

When we photograph tall object, like buildings, we can run into a similar situation. It looks right to us when we look at it with our eyes, but when we photograph it, we get the wrong perspective. The buildings look wrong.

Thankfully, there is a solution for this problem in Photoshop. You can transform a distorted building with Perspective.  

If you have never used the Transform commands (on the Edit tab) then it might be helpful to check out this video from Adobe. This is just a general overview of the transform options, but it will give you lots of ideas.


Looking at some images taken last week of very tall buildings, you can see that they look distorted. It is easy to manipulate them just enough to get the right perspective for our human eyes.


So, go find something really tall and take shots of it that make it look distorted. Then go into Photoshop, create a new layer, and play with the new layer using Edit/Transform/Perspective and see what you create.