Showing posts with label portraits. Show all posts

Sunday, November 27, 2016

Get More Out of Your Wide-Angle Lens

Many photographers feel that portrait lenses are only 50mm, 85mm and 135mm, which is also why the 70-200mm F/2.8 is the best selling lens in the world whether they are made by Canon, Nikon, Sigma or Tamron.

I know you will think I am crazy but you can actually get more use out of your wide-angle lens than just shooting landscapes. One of the really creative uses for your wide-angle lens is Wide-Angle Portraits!


Wide-Angle Portrait by standing above and shooting down

Now before you start flaming me saying I have gone off the deep end, hear me out. Yes a wide-angle lens will make your subjects face all exaggerate because their nose might look huge and their eyes and ears small, but by shooting creatively you can make that wide-angle to create some really awesome shots.

Instead of shooting your subject head on like you would with a regular portrait lens, try shooting them from above, pointing the wide-angle lens down at them, or if you are shooting a full body portrait, shoot from their feet. Why would you shoot at their foot level??? Well because you will make them seem taller. Every wonder how Hollywood can make an actor 5 foot 6 look 6 feet tall, well they shoot them from down low with a wide-angle lens and *BAM* Tom Cruise looks like he’s 6 foot tall instead of 5 foot 7.

Getting down low with your Wide-Angle creates a new perspective
 Another great use for your wide-angle lens as far as portraits go is the Environment Portrait as you can capture your subject and more of their surroundings. Now one thing to keep in mind when shooting with your wide-angle, get closer or you end up with them looking like an action figure instead of an action hero.


Hercules - this image borrowed from Digital Photography School.com

Even when using your wide-angle for landscapes, make them more interesting by shooting at ground level. If you are afraid to lay down on the ground, crouch and set the camera on the ground and shoot. It might be a little tricky to get your focus lock, but if you use Back Button Focus, it’s much easier.

Additionally, you can shoot multiple people and placing them at different distances you can make some really cool looking photos!


Environmental Portrait from Digital Photography School.com
 Now that I got your creative juices flowing, grab that wide-angle lens and make some awesome images!

Comments/Questions

Sunday, December 13, 2015

Portrait Lenses

Since as a photographer portraits will probably be your bread and butter, this is a question that is asked a lot by photography students, “What lens or lenses are best for portraits?”

As a general rule, we recall people’s feature best from what’s called the 15 feet rule. In the case of facial recognition, when we see a familiar face, our brain is triggered to reconstruct an image of that face and those features as they appear from 15 feet away according to researchers, so,in order to achieve realistic proportions, we need to shoot from around 15 feet from the subject.


Outdoor portrait shot from around 6 feet with my EF 85mm F/1.8

So, what is the optimum portrait lens? Well it depends on how much of a person you are shooting and show much you want showing. If you want the whole person standing, then you would use a 50-70mm lens, if they sit down then a 50-105mm would work great. If you want a tight head and shoulders shot, then you’d want at least a 200-300mm lens since you want to still be around 15 feet away. Ever see a professional model shoot on location? The photographer is usually using a fat lens on a monopod like a 300mm F/2.8 or even a 400mm F/2.8.

Now I am not advocating that the 15 feet rule is set in stone, different photographers will shoot from different distances to get the look they want. I will sometime used a 50mm and get closer to the subject, with the 50mm, the distance is around 5 feet with a full frame body like I use and I also love, as many photographers do, to shoot portraits with my 85mm portrait lens and when using that lens I can stand at around 9 feet from the subject and fill the frame nicely.

Environmental portrait of WWII actor shot from around 15 feet with 70-200mm lens at 200mm

Many photographers these days will just use their 70-200mm F/2.8 for all their portrait work, which is why this particular lens is the most popular and the lens that sells the most by any builder. One thing you do want to remember when shooting portraits is to be mindful of the distance you shoot from as when you get closer you can make the subject’s nose bigger and their ears smaller. Shoot from too far away and you make their face flat.

Also remember your depth of field as generally the idea is portraits is to make the background disappear, you want the background to be blurry and out of focus as your subject is the important part of the image in an portrait.


Comments/Questions

Sunday, March 8, 2015

What Lenses Should I Buy?

One of the questions posed frequently to myself as well as to the professors at AI is this one. The question is a tricky one to answer because there are a couple of factors to consider, such as how much money you can afford to spend and what your photographic style is.

If you shoot landscapes, then you want to buy a wise lens such as a 10-20mm or 17-40mm. Both Canon and Nikon offer a decent 18-55mm as one of their standard kit lens. Although the 18-55mm is a inexpensive one, they make very good images from my experience. Of course if money is not a major concern and you shoot Canon, you can go with either the EF 16-35mm or the 17-40mm L lens. On the Nikon side you have the 14-24mm which is an excellent, high quality lens that makes fantastic images.

For those that want to shoot wildlife or anything else that requires more reach, you can look at 70-200mm, which is an extremely popular zoom used by many professional photographers. At 70-200mm you have the most popular focal lengths in a single lens. Both Canon and Nikon make very high quality lenses in this range, as does Tamron if you are budget minded. This lens is also available in both a less expensive F/4 aperture and the faster, more expensive F/2.8. If you want the F/2.8 without spending $2,000-$3,000, then look at the Tamron, which runs around $1,000 and from every review I’ve read by pros say that it takes every bit as soon an image as the more costly ones made by Canon or Nikon.

                                   Portrait shot using Canon EOS 5D with 28-135mm @ 135mm

Your bread and butter will be portraits, then you want to get a prime portrait lens. The most common lenses for portraits are the 50mm, also known as the Nifty Fifty, 85mm and 135mm. When it comes to Canon, there are three of each the 50mm and the 85mm to choose from and again, it mostly depends on how much you want to spend. The 50mm F/1.8 is inexpensive at around $100 and makes really good images, the 50mm F/1.4 USM is around $400 and is much better build quality and takes even better images. The third is the 50mm F/1.2 L which is very expensive but also makes the best images. In the 85mm, Canon makes the $500 F/1.8, the 85mm F/1.2 L original and the newer 85mm F/1.2 L Mark II. The L series lenses are expensive, running around $2,000 and believe it or not, the less expensive F/1.8 makes much better images. The original L series 85mm had lots of issues with color fringing and the Mark II edition has AF issues. The third and final really good portrait lens on the Canon side is the 135mm F/2 L.

                                 Abandoned Rite Aid shot using EOS 6D with 17-40mm F/4 L

Regardless of what you are going to shoot primarily, it is always a good idea to have 3 or more lenses as you never know when you might need another focal length or prime. I love to shoot landscapes, but like most photographers, I know I need to shoot portraits as well as that is how most of us pay the bills. Since I need to do portraits as well, I own the 85mm F/1.8 USM and the 50mm F/1.4 USM. I am also planning to at some point down the road to buy the 135mm F/2 L so that I have a little more reach.

I hope this information helps you to make some choices on what you want to carry in your camera bag, now get out there and make some images!

Comments/Questions

Sunday, February 22, 2015

How to Keep Your Creativity Fresh

One of the many challenges for photographers when starting out as well as experienced shooters is how to keep your creative juices flowing?

We often times get bogged down with other things, children, day jobs, home and car repairs, or just plain everyday life in general and we can lose our edge. You might be shooting portraits most of the time because it is your ‘bread and butter’ or how you pay the bills but then you get into this rut of shooting the same stuff over and over again and next thing you know, you’ve lost your creative edge.

One of the things I do to try to keep myself creative is I constantly look at things with a ‘photographer’s eye’. Sometimes it works, sometimes it doesn’t but it helps to keep me from hitting a creative rut. I’ll look at things in my surroundings at my day job and imagine how I could photograph them and make them look interesting. I even go as far as to keep my Sony NEX 6 in my backpack all the time, not only so I can shoot any one of the hundreds of accidents I see on my way to and from work but to keep my creative juices flowing.

How would my keyboard look shot from this angle or that? What can I use that I have at my desk to create an interesting effect in my photography? I even do this when I am out shooting for my personal project, ‘Forgotten Pieces of Georgia’, I am never just shooting my project. I love railroad stuff and it’s usually popular on sites like 500px.com, so I take 3 or 4 bodies with me in the car with different lenses so I don’t have to mess around changing lenses, I can just grab a different body and shoot something new along the way.


                                   Plain RR crossing sign, I shot it and made it more dramatic

I know many students will say, “well that’s all well and good but I only have one camera body, I cannot afford to have two or three of them, they are just too expensive”. Depending on your situation, this may be true, but if you have a decent day job, I’ll bet you can afford more bodies. One of the best sources is www.craigslist.org or eBay but I prefer CL as I can meet the person face to face and test the equipment out. You need to remember what I told you in an earlier post, you don’t need the latest and greatest camera to make awesome images and I know the Professors here at AI will back me up on that one. Stop getting hung up on Mega Pixels and the latest bells and whistles and buy what works and is reliable.

I personally have technically eight cameras in my collection. I have the Canon 1D Mark II, Canon 50D, 2 Canon 5D Classics, a Canon 6D, a Sony NEX 6, the iPad Air 2 and my iPhone 6 Plus. Only a couple of these cameras are new models, the rest are up to ten years old but I still use them as they still work and take fantastic images. I also know from personal experience you can go on-line and find say a Canon T1i or T2i for next to nothing. I have seen them sell for as little as $100-$150 and whether you realize it or not, they have the exact same basic technology as the new T5i you got through the school.

If you ask anyone that is knowledgeable in cameras, especially Canon gear, they will tell you to this day that the 1D Mark II and 5D Classic take fantastic images, especially if they are clean and in good working order. The 1D Mark II is around 12 years old but is one of Canon’s first cameras with high frames per second for sports shooting and I also keep it for some studio work as I have the AC studio power supply so I can shoot without batteries for hours and hours. It’s only 8.2MP but anything 6 and higher is more than enough. I actually used it for several of my classes at AI and received compliments for my images shot with it not only from my Professors as well as classmates.


                                        Laotian ceremonial pray bowls, shot while kneeling

So shop around, pick up a spare Canon T1i or T2i or XSi for $100 or so, shoot some test images to see if the sensor is dirty, if it is clean it yourself or take it to a shop and pay $30-$50 to get it cleaned and *BAM* now you have two bodies to use.

Now that you are properly armed for anything, work on new ways to keep yourself creative. Have a 2 year old at home, get down to their level and take a look around. See things from their eyes and then shoot what you see, you’d be amazed and how you can use a simple idea like this to come up with some great new images and keep your creativity going.

Comments/Questions

Sunday, December 14, 2014

Night Portraits

   Since photography is literally “painting with light”, one of the greatest challenges in photography is having enough light to do your work. Many photographers buy cameras especially made for high ISO with low noise like the newer Nikons. Other photographers learn and hone their skills using off camera flash like Canon or Nikon Speedlights and still others just avoid shooting in low light situations all together.

    I am personally the kind of photographer who is not afraid of new challenges and always willing to try something new and leave my comfort zone. Yesterday I went out and shot for my personal project as well as my Professional Portfolio class. In the evening, I met with my new photo club to shoot Christmas lights in Conyers, Ga. I have not done a lot of night shooting other than night time long exposures but wanted to try something new, so in addition to shooting Christmas lights around the city, I played around with some night portraits.


    I used one of the clubs member’s son, who was with us and frequently becomes his mom’s modeling guinea pig and made him my victim as well. I did two portraits of him standing in a partially lit alley with only a street light above him and using my iPhone 6 Plus on “torch” mode with it’s LED flash on continuous as a catch/fill light. I am posting them here in both color and B&W as I think the image works either way. I am not saying they are perfect, but I think they turned out pretty good for a first time trying this.


    The point is, in order to grow as a photographer, we need to be willing to try new things and get out of our comfort zone. I know you’ve heard your professors tell you that a time or three and it’s true. To really grow and perfect your skills as a professional, you have to try, practice and experiment. Now get out there and make some awesome photos!
Comments/Questions

Thursday, September 18, 2014

Why shouldn’t I shoot my family and friends for class?

Just finishing up my Portraiture class and I must say its been the toughest one yet. Not tough because the assignments where hard but tough in the fact that each assignment required a new person. In total I needed to photograph 25 different people in 6 weeks. It was hard to find all these different people and keep them to your schedule. Everyone has family they could always use but the problem with that is your family wont end up as a paying customer later on.  They will always expect you to shoot them for free. It seems pretty sad but that is the way it works.
In all of my assignment this past 6 weeks the hardest was to find 8 people to photograph together. To accomplish this I put some feelers out weeks in advanced but most of those options fell through. My last and final option was to ask a friend if she knew of anyone that I could get to photograph. I figured since she has 3 kids and herself that would kill off half of my requirements right there. However this particular week none of her kids could show up for the event. I was lucky though because she know a lot of other people and found me the 8 I needed in the nick of time. By the end of my shooting I had people asking for a card, wondering if I could shoot an up coming event.
I was grateful that these people who I didn’t know was asking me if could do other work and that they would be contacting me in the future. Without shooting these strangers I would have never got my name or my information out there like I did. I learned the in the end it might pay off to shoot people you don’t know because they may want your services in the future. The event that I was asked about is for the republicans in town so they will probably want a hand out, however it might be one of those handouts that gets your name out there for paying work. These politicians might need head shots or things like that. While doing the event for free might make them think you will do everything for free, you can quickly let them know what you charge for those types of services.

So I recommend getting yourself out there and looking for ways to network and find potential future clients. You obviously wont get paid to shoot them for your class assignments but if they can see the quality of work you can provide them, then you might very well have made a connection to turn them into a client.


Here is my funny face shot of my 8 people. In the end this probably was my best assignment. 


TBT

Thursday Ambassador


Tuesday, July 29, 2014

7 Techniques for Better Portraits

If you know me, you will know that this is a rather odd post for a Nature photographer, but this blog post is going to explore two areas: 1.) 7 posing techniques and 2.) why you will be seeing more portrait tips from your Tuesday Ambassador.  Let's get started with some great tips.

When photographing a subject/model, there are many things going through your head as you fire away--is my exposure good, is my white balance set appropriately, am I shooting in RAW, how does the subject look in relation to the background, are they framed appropriately, did I make adjustments to my camera settings that I should have reset before I started, oops they blinked -- take another shot, etc.  There are far more things to consider besides these basics to capture some really technically proficient portraiture, and, although it may seem overwhelming, the more you practice and implement these techniques the easier it will come--like second-nature. 

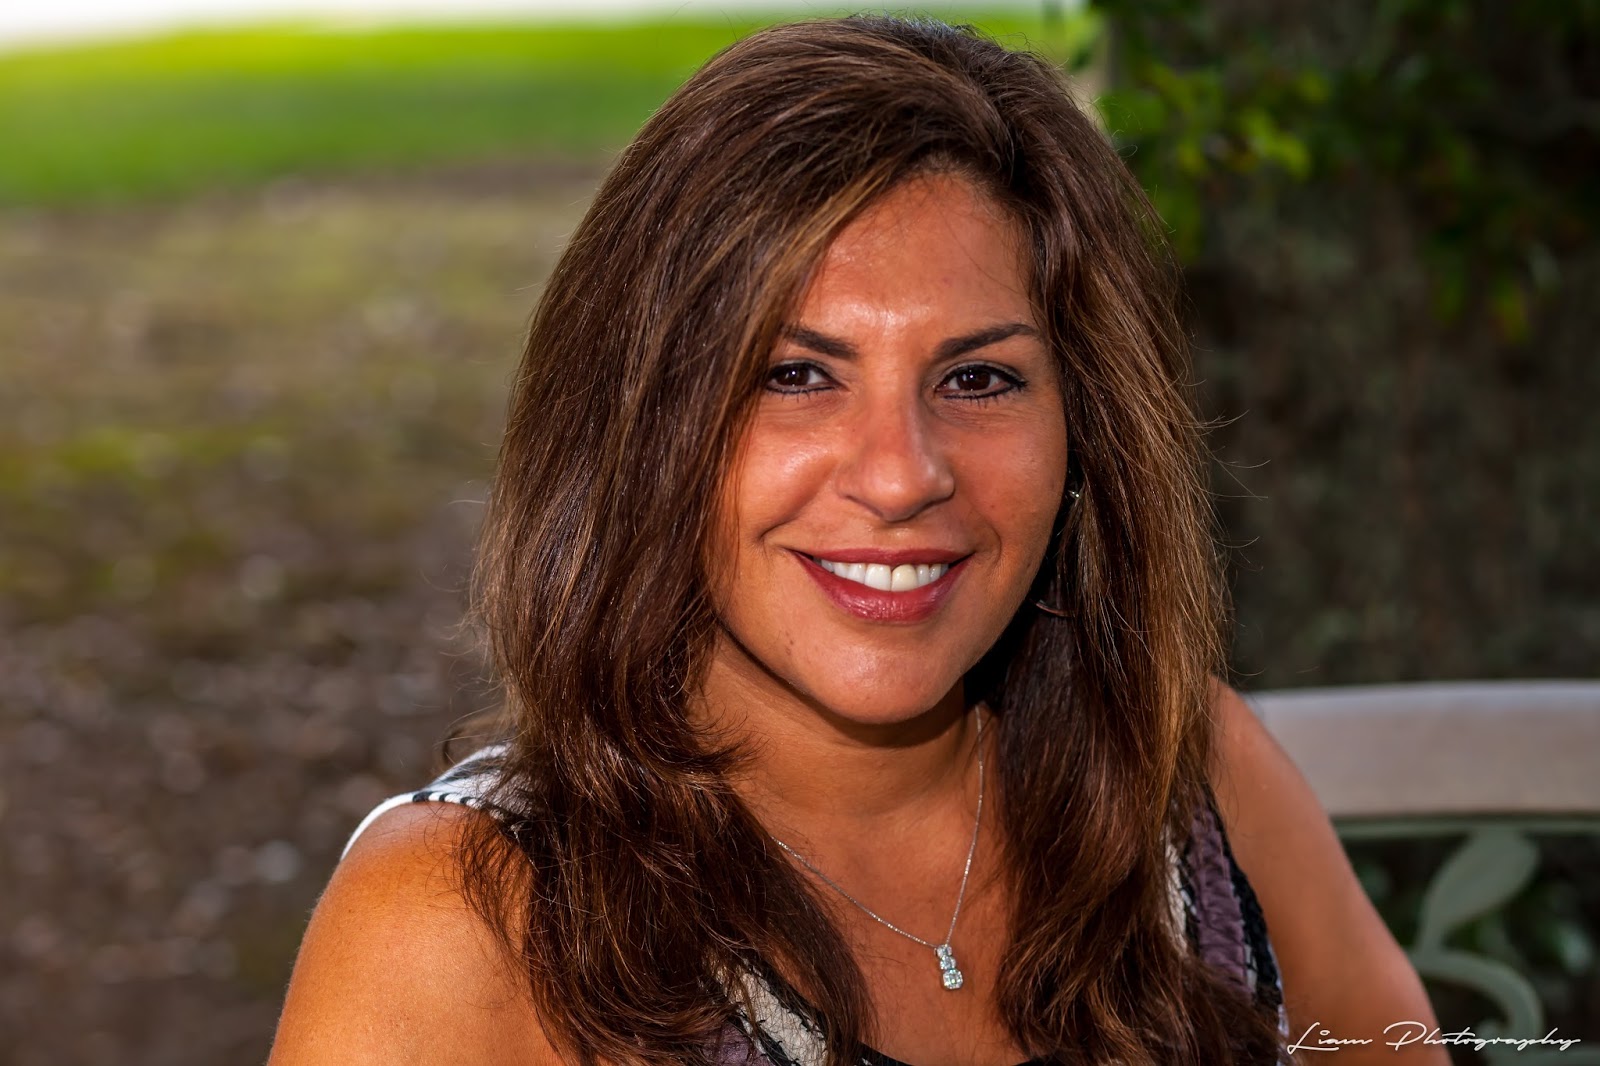
The first tip to better your portraits is posing the hair.

"How do you pose hair?" you may ask.  There is generally no "rule" for what works best here because everyone is different, but pay attention to the way the hair lays over the shoulders and where the hair is parted in relation to the camera.  It is recommended to avoid having hair falling over the sides of the shoulders.  If possible try one or more of these hair poses:
  1. All hair behind the shoulders.
  2. All hair in front of the shoulders
  3. All hair on one side.
  4. All hair on the other side.
  5. All Hair up (pulled back).
Hair will tend to fall naturally or with an intentional part.  It is further recommended to have this part in the hair facing the camera so that more of their face is in the frame and not hidden behind hair.

The next tip is to pull the ears forward.

"Wait, what?  How you do pull the ears forward?" you may be wondering as you question where I learn these crazy tactics.  This is a development to originally asking your subject to pull their chin forward; often, asking your model to do this will cause them to lift the chin up and you will therefore be capturing the inner-workings of their nostrils.  Avoid this by asking them to pull their ears forward and by doing this you are hiding the appearance of a double-chin and it makes the jaw line slightly more defined as in the examples below.  It may feel unnatural and uncomfortable to them but the intent here is to make your portraits better and with that comes a slight, temporary awkwardness.


Tip number three: lift the arms up.

When having your subject or model posing for you the natural response is typically to let the arms fall flat to the sides.  It causes them to look awkward and squishes the arm against the body causing it to look bigger.  You can ask them to lift the arm an inch or two away from the body as if it were floating or have them place a hand on the hip with the pinky-side of the hand facing out.  This will create the illusion of length.

Tip number four: leave visual space at the waist.


The above photo is an example of how you can maintain the perception of a slimmer waist as demonstrated by the red line.  The arm, when pulled away from the torso, will reduce its visual size.  This also applies to other objects that may be in the background such as light poles, trees, and even other people.  These have the potential to add bulk to the torso so be conscious in isolating the torso.

Tip number five: turn the shoulders.

This may be second-nature to you, but it is important to understand exactly what this does.  When your subject or model stands square to you it makes them appear larger and more broad.  By having them turn their shoulders they are slimming their profile and will thus appear slimmer in the photo as we can see below.  Note the slimmer area between the first red line and the one on the right.


Tip number six: avoid showing the whites of the eyes.

You may start thinking about how much editing you have to do to make the eyes look whiter, but this is about position of the iris.  To keep a portrait looking natural and not awkward, avoid telling them to simply "look away," rather, give them a specific area to focus on where you can control their eye-line.  If you can see more of the whites of their eyes than you can the iris, or colored part, ask your subject to direct their gaze somewhere that brings their eyes to a more pleasing position as you can see in the photo below.


The seventh and final tip for better portraits is to not let the nose break the face.

It sounds confusing, but let the photo below illustrate what I am talking about.  Turning the face too far in one direction will ultimately cause the nose to break the natural curve of the face.  This tends to make the nose look bigger and is also referred to as the "Pinocchio" effect.  Have them turn their face back towards you until there is a small space between the nose and the adjacent cheek.   


It certainly sounds like a lot to consider, but once you put it all together you will have new skills to create better portraits.  So, as a self-proclaimed Nature photographer you might be wondering why I am offering tips on portraiture all of the sudden.  I am currently in the Portraiture class right now and I feel as though I have uncovered a hidden talent, opened a door of potential that I never knew I had or never thought I would want.  I know I have a lot to learn still but these small steps will help us all create better portraits.

Do you have any tips for better portraits or questions that I might be able to answer?  Comment below and thanks for reading today!


Works Cited

Lucas, Ben. "7 Posing Techniques for Non-Models."photography.tutsplus.  Envato Pty Ltd., <http://photography.tutsplus.com/tutorials/7-posing-techniques-for-non-models--photo-15608>
 
Lucas, Ben. "Portrait Posing Chin 1." Photograph. photography.tutsplus.  Envato Pty Ltd., <http://photography.tutsplus.com/tutorials/7-posing-techniques-for-non-models--photo-15608>
 
Lucas, Ben. "Portrait Posing Chin 2." Photograph. photography.tutsplus.  Envato Pty Ltd., <http://photography.tutsplus.com/tutorials/7-posing-techniques-for-non-models--photo-15608>
 
Lucas, Ben. "Portrait Posing Waist." Photograph. photography.tutsplus.  Envato Pty Ltd., <http://photography.tutsplus.com/tutorials/7-posing-techniques-for-non-models--photo-15608>

Lucas, Ben. "Portrait Posing Shoulders." Photograph. photography.tutsplus.  Envato Pty Ltd., <http://photography.tutsplus.com/tutorials/7-posing-techniques-for-non-models--photo-15608>
 
Lucas, Ben. "Portrait Posing Eyes." Photograph. photography.tutsplus.  Envato Pty Ltd., <http://photography.tutsplus.com/tutorials/7-posing-techniques-for-non-models--photo-15608>
 
Lucas, Ben. "Portrait Posing Nose." Photograph. photography.tutsplus.  Envato Pty Ltd., <http://photography.tutsplus.com/tutorials/7-posing-techniques-for-non-models--photo-15608>

Thursday, December 5, 2013

Overcoming Yourself


 Matthew at Lake Tahoe, (Thursday Ambassador) ©MOKOPhoto 2013

Prior to PH 123, the only experience I had taking photographs of people was shooting my husband.  I found the thought of shooting anyone else horrifying. I am not certain why.  It could possibly have something to do with me being very socially awkward...I don't do well with people, and never have.

I have always been in love with nature, and fascinated by the act of capturing a moment of nature in time.  The world is ever-changing, and no two shots in nature are the same.  They may look the same, but there is always something different....

  Back on point, there was an assignment in PH 123 which required I shoot three different people, and they could not be anyone living in my home.  Me shooting my husband went out the window.  I had no idea what I was going to do.  Luckily, he is a problem solver, and he hates to see me upset.  He had a plan.

At work, I was sitting at my computer when I saw my husband walking from across the street with two of our occupants.  Bless his heart, he had asked them if I could shoot them for my assignment, and they happily said yes. I shot them in my office, and out front on a bench.  The images turned out great considering it was my first time.


Angel, (Thursday Ambassador) ©MOKOPhoto 2013

I needed one more person, so I went to my friend Bev's to see if I could shoot her, and she decided to ask her wonderful son Angel if I could shoot him.  He is such a great kid, and gladly said yes.  Once again, I surprised myself.  All the images turned out well, though all needed a few adjustments.

I stepped outside my comfort zone for that assignment. I broke myself into  shooting people with that assignment.  I am forever grateful, because I know that it wont be so frightening next time.  The pictures weren't perfect, but it was an awesome learning experience.  I encourage all other students to step outside your comfort zone.  Who knows, I may one day only shoot portraits instead of  working for NatGeo, which is my current goal. I will obviously need much more practice, but nothing is impossible. It never is.

Sunday, September 22, 2013

Creative Self-Portraits

Happy Sunday Everyone! We all made it through another long and busy week. I think I mentioned somewhere that my current class is Photographic Design. Honestly when I started the class, I wasn't sure what to expect. The information on it really didn't go into great detail. We just hit the end of week 2 and class is just cruising by, I wanted to talk a little about one of the assignments this past week: Creative Self-Portraits. This assignment took a lot of thought and serious reflection on my part. I mean you have to think about who you are and what makes you, you.. Keeping in mind that you, cant necessarily be in the photo itself. That means no putting it on the tripod and taking a full face shot. You can have body parts in the photograph, but not your face.. Sounds difficult.. Slightly, but if you really think about it, the ideas will come streaming out.. Don't forget to jot them down so you don't forget..

I did some research and found some really amazing photos taken by some very talented photographers. That just added to the motion in my head. So I pose this question to all of you out there hopefully reading this blog.. What do you think makes a great or outstanding creative self-portrait and how far would you go to take one that will really make an outstanding impression.

Below are a few that I took this past week. Please feel free to leave feedback... We all LOVE feedback.


 Photos by Wayne Salat
                                                                    Photos by Wayne Salat
 Photos by Wayne Salat
                                                                                           Photos by Wayne Salat


Enjoy Your Sunday and Photograph Something Everyday!


Sunday Ambassador~ Wayne

Thursday, September 5, 2013

Liquified!

Good Thursday morning everyone. I had someone mention my last post in a class the other day. That was so exciting. It really means a lot to us to know you are reading. We cherish your feedback!

Something else that excited me happened this week also. Last Saturday I took fashion photos out at the beach and then got to play with them. I planned to create a water effect from this image, but I was overwhelming surprised by the liquefy effect in Photoshop. I took shells, and water colored tulle for my model to lay on and in. The image with no post-production was quite satisfying, so I assumed I could really go someplace great with it.

I had an image of a lighthouse with its reflection on the water that was slightly rippled, but very calm for Lake Michigan! Because I was working on a Lighthouse project, this image worked into my scheme.  By itself it creates a very interesting image, but a lot of people will wonder what the shadow is along the side.

Placing the water over my model, I lowered the opacity to 66% so that it created a soft watery look over her. Then came the fun. I duplicated my portrait layer first of course to preserve it (don’t forget this step)! Using the Liquify (apparently Adobe doesn’t know how to spell J) tool, found under Filter, I began playing with her hair and the tulle around her. I used varying sized of brush and pressure. The rest, beneath the water layer, was almost like oil on water. I was so excited, I couldn’t wait to share.
What have you created lately that you couldn’t wait to share. Tell us about it. We get as excited over other’s work as our own!