Sunday, June 19, 2016

Are Drones Dangerous?

As I am sure you and most everyone is aware by now, drones are becoming more and more mainstream, especially professional drones. No I am not talking about the Reapers that Uncle Sam uses to rain down Hellfire missiles on terrorists, I am talking about photography and videography drones.

I personally own the DJI Phantom 3 Professional drone and love it! But many people are nervous or even scared of drones after all of the negative coverage on the news, especially on TV. They hear stories about drones falling on people or crashing into objects and wreaking havoc on innocent people.

People are afraid of many things, and thanks to all the negative press, many people are afraid of drones. They are paranoid that someone is using a drone to film them in the shower, or in some other "Peeping Tom" fashion, or that a drone will fall out of the sky and hit them or their children in the head.

Still from video I shot in Barnesville, Ga with my Phantom 3

The truth is drones are no more dangerous that anything else and safer than cars, yet you drive your car all over town every day and never give another thought about it. The incidents of drones crashing are the exception, not the norm as a general rule, anyone like myself that has spent considerable money on a professional grade drone will take the time to learn everything they can about it to fly it as safely as possible. I watched hundreds of videos on the Phantom 3 and drones in general to try and make myself as knowledgeable as possible on the subject of drones and safe drone flying.

Additionally, the better, professional drones like mine come equipped with a "Safe Mode", which prevents the drone from flying more than a certain distance away from it's GPS "home point" and it also doesn't allow you to fly more than so many meters off the ground. The manufacturers
put these safety features into their software to help prevent people from making serious mistakes and hurting people or property. Once you have mastered your drone and honed your piloting skills, you can take it out of "Safe Mode" and then you can fly mine up to 2 miles from the take off point and fly to the maximum legal altitude which is 400 feet in the U.S.

The point I am making is that drones, like many other items are just another tool in a professional photographer's bag. A drone can be dangerous, but why live in fear of something happening when the chances are Slim to None and Slim is out of town. I personally have practiced with mine a lot while nowhere near people or property, I also use and recommend an app call UAV Forecast, which uses your GPS location to tell you if the weather is suitable for flying or not.


Railcar I shot in Barnesville, Ga with my Phantom 3

Most anyone that is a serious drone photographer or videographer is going to spend considerable time learning everything they can about their new gear before they ever use it out near people or objects that it could cause harm to, no one want to pose a risk to the health and well-being of others on purpose and most of us also buy special drone insurance just in case something does go wrong. Many of you probably don't even realize that a lot of your favorite TV shows and movies now use professional drones with professional "pilots" flying them to film.

With the enormous cost in making a block-buster movie these days, studios look to save money any way they can and a $1,000-$5,000 drone that be used over and over again is way more cost effective than say a $60,000 a day camera boom truck. Just as many of you might not be aware, but the GoPro action camera is also used by many studios for shooting TV shows and movies because again a few $300-$400 GoPros mounted on car bumpers for chase scenes are way cheaper and the GoPro is capable of extremely high-quality video and stills with it's 12MP camera capable of 1080p or even 4k HD video as the new model is capable of and so is my drone.

If there is one thing I want you the reader to take away from this week's post is that drones are nothing more than another camera "body" and most of them are being flown by professionals who take flying and filming with them as seriously as any other photographer using any other conventional camera body and lens combination. So, next time you are out at a skate park or some vacation spot like a beach in Florida and see someone flying one of these professional drones, instead of being afraid of the drone, walk over and strike up a conversation with them.
I have people walk up to me and ask me about mine all the time and many times they ask me to shoot some footage or stills of them.

Keep in mine that the media loves to blow things out of proportion as they are looking for ratings and sensationalism and less about sharing the truth on a subject. Now get out there and check out some drone photographers, or rent one and try it out for yourself!

Comments/Questions

Sunday, June 5, 2016

Don't Let Social Media Stifle Your Creativity

Social media sites like Twitter, Instagram, Facebook, 500px.com and others can be a great way to share you work as a photographer, but they are not the end all be all. Many times photographers get discouraged with the results they find on these sites, especially if they don't receive a large amount of "Likes" or "Shares" or "Favorites".

These responses are not an accurate gauge of your creativity or ability as a photographer, they are more the results of Social Media popularity contests. I have talked to and see so many photographers become discouraged with these platforms because they don't gets tons of "Likes" or "Shares", they think their work is not good enough or that no one likes they creative flare.

When it comes to your art and your work, you have to be the one true judge of your creativity and always strive to try new things and think outside the box. I can personally tell you from experience that I have posted photos on 500px.com and even on Facebook that got very little attention, but that same photo on EyeEm.com and Getty Images is selling like hotcakes.


Tybee Island Sunrise - Not liked at all of Social Media, sold 50 copies on Getty Images
 On the other hand, images I have posted that got scored really high or gotten lots of "Likes" and "Shares" didn't sell at all even though they were fantastic images and very creative and visually pleasing. The point is you are the best one to determine your best work and you can also get a more professional, objective opinion from your professors while you are still in college or from other professionals you are friends with or network with in the real world.

Social Media sites and platforms can be great for getting your work out there and noticed by a wider audience of people and perspective clients, but if you go into Social Media with the wrong mind-set, it can also suck the life out of you creatively. I find that a good way aside from the ones I mentioned a moment ago to have your photos honestly critiqued is to join some of the larger photography groups on Facebook that have been around for a while and have a large number of pros and seasoned hobbyists that are very active on there.

I personally created a Photography Twitter account that is totally separate from my personal one and have picked up quite a few professional photographers as followers and some of them are even nice enough to talk to me on there via Direct Message on a regular basis and are even kind enough to give me honest feedback on my work that I post there all the time. Some of your more famous photographers like Chase Jarvis and Zack Arias won't give you the time of day on there and most of them won't even answer emails either but there are still some pros out there that are more than happy to talk to you and even critique your work, such as Jared Polin from FroKnowsPhoto.com, Josh Schmidt from PhotoTipsHQ.com, Ken Rockwell from www.kenrockwell.com and Leigh from www.snapchick.com.

Wall of Light - Got tons of Likes and Shares, was used by AI for publications, never sold a copy
 I have also had personal exchanges by email with David Hobby and Scott Kelby as well, but they are a bit harder to catch up with as they are always so busy and get so much email, and I have never felt like bother either one of them for a photo or portfolio review/critique.

The point I am trying to make is you cannot let these sites pull you down and make you second guess your abilities or creative abilities as a photographer or artist. Take most of the response you get on Social Media with a grain of salt, I don't even let myself get overly excited when people gush over my work posted on there, but I do make sure I always thank them for their comments.

Comments/Questions

Sunday, May 15, 2016

Street Photography

This week I want to talk about a subject that probably makes many of you nervous, Street Photography. Many new photographers cringe at the thought of shooting street, but if you are a photography student, then I am sure you have had a professor or three tell you that you need to learn to start shooting outside your comfort zone.


College student taking a catnap on the steps in Centennial Olympic Park downtown ATL
 Street Photography doesn’t have to be scary and there are some tips I am going to share with you this week to hopefully make you more successful at it. The key to doing Street Photography is being discreet. You don’t want to be out there with your biggest telephoto lens, trying to avoid human contact because you will make your subjects nervous. Take your camera body and a prime lens like a 35mm or 50mm, these lenses will require you to get more up close and personal, but that is the whole idea. Don’t take a flash with you or anything else that will be intrusive or invasive to your subjects, for Street Photography you want to be a minimalist.

Woman walking and texting on her way to bus stop
 Mirrorless is a good camera to use for Street Photography as most of these models are extremely small and light weight, yet make amazing images. Get up close to your subjects and interact with them, talk to them, get a little bit of their story, build some rapport and you will find that Street Photography is not so hard to pull off.

If you are someone like myself who is fairly sociable to begin with and can build an instant rapport with people, then Street Photography will be easier for you. If you don’t have this natural knack, then take it slowly and don’t try to force the issue with your subject. Be respectful of them and their personal space, you don’t want to drastically interfere with their routine or whatever they are doing, but you do need to interact with them enough to make this process easier. Talk to them about the weather, the local sports team, how terrible the traffic is (especially if you live in Atlanta), or anything else that strikes your fancy. Stay away from HOT topics like politics or religion, I don’t want you getting into a hostile debate or getting attacked by some nut.

As you get more and more experienced at shooting Street Photography and become more comfortable, you may find that you really enjoy shooting it. I know I did during the last two years I worked in downtown Atlanta. Also when you become more confident, some people will actually approach you and ask to be shot as part of whatever you are shooting for, I have had this happen numerous times and it can be a lot of fun!

Rodney here is one of the many people that have stopped me and asked to pose for a street portrait
 The important things I want you take away from this week’s blog post is that Street Photography doesn’t need to be scary. If you keep your gear to the bare minimum and take the time to talk to your subjects you will find that this style of photography is not nearly as frightening as you originally thought.

Comments/Questions

Sunday, May 8, 2016

Understanding Aperture

There are three key components of the “exposure triangle”, Aperture, ISO and Shutter Speed, and today we will be talking about Aperture.

An easy way to think of the Aperture of your lens is to think in terms of the human eye. Since your camera’s sensor “sees” things much as your eye does and then records those images in a physical form, we can think of Aperture the same way.

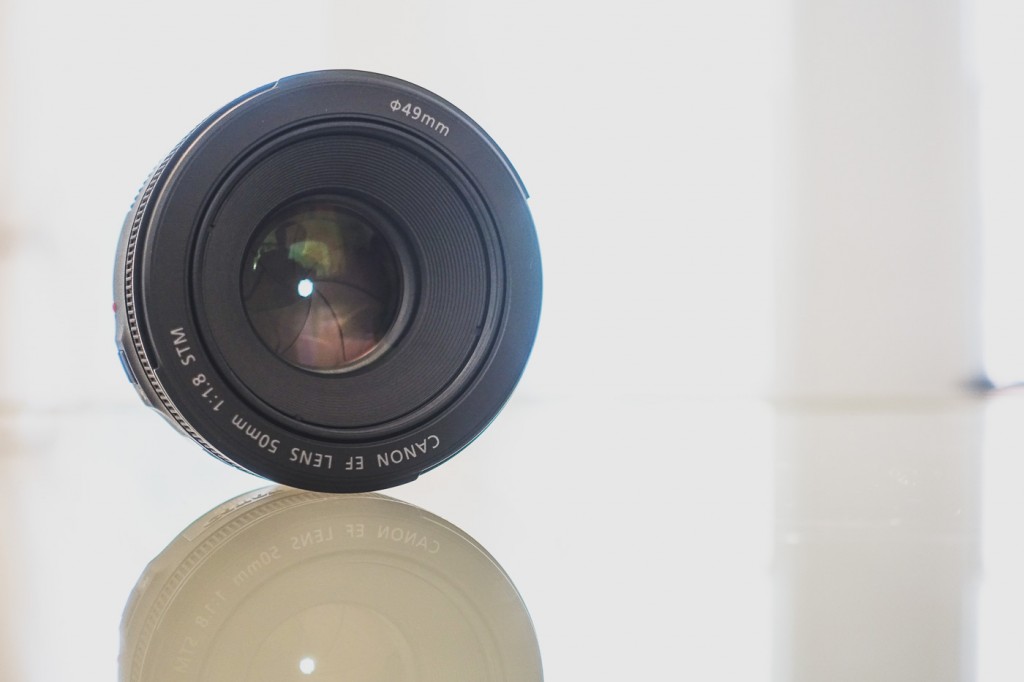
Every lens is made of a a group of glass elements and also a group of Aperture blades. The blades are what limits the amount of light passing into the lens and onto your sensor. These mechanical blades work the same way your pupil works, when in a low light situation, your pupils open up larger to allow more light in so that you can see better and when you are out in bright sunlight, they shrink down to tiny dots to reduce the amount of light coming in.

My Canon EF 50mm F/1.4 USM wide open at F/1.4

Aperture blades do the exact same thing, only mechanically and you control them. So a wide Aperture lens like my Canon EF 50mm F/1.4 USM when set at 1.4 is wide open, like your pupil is in low light and I can shoot better indoors at say a concert.

When I am shooting outdoors in sunlight, I will generally set my Aperture to say F/5.6 to F/8 and the blade will reduce the size of the hole in the center of my lens allowing less light into my sensor like the image below of the Canon EF 50mm F/1.8 II. The process of engaging the blades in your lens is known as stopping down as you are reducing the amount of light getting through the lens to your sensor.

Stock image of Canon EF 50mm F/1.8 II with the blades closed all the way
 Aperture is measured in stops and you will see it marked on your lens in the following values. Let’s say you have a standard kit lens of 18-55mm. That lens generally has an Aperture of F/3.5-F/5.6, which means at 18mm it can open as wide as F/3.5 but at 55mm it can only open to a width of F/5.6.

If you are looking at the popular 70-200mm lenses, they generally come in two varieties, F/2.8 and F/4. The F/2.8 model will allow more light, in this case one stop more, than it’s F/4 counterpart.

Aperture also directly impacts your Depth of Field in your images, especially in longer focal length lenses. We all strive to achieve that creamy background blur and bokeh, and using a low Aperture with a longer focal length lens is how that is accomplished. This is one of the reasons wedding photographers will generally shoot with the 135mm F/2 or the 70-200mm F/2.8 lenses. How your bokeh looks in your images depends on how many blades your lens has. A five blade lens will not be able to make perfect circles, but then again, some people like their bokeh to be more angular, where I prefer mine to be as close to perfectly rounds balls of light. When shooting landscapes, by stepping down the Aperture, you can keep more of the scene in focus and get that beautiful wide shot where everything looks fantastic!

Notice the creamy Bokeh in this shot I took in Monroe, Ga.
 Another thing to keep in mind is that every lens has a “Sweet Spot”, which means the Aperture at which the lens shoots at it’s sharpest. You will need to test your lenses for yourself to find that “Sweet Spot” area, but on most lenses, it’s the area between F/5.6 and F/9.


Janice Mcgregor shot this one with the Canon EF 28-135mm check out that blurry background!
 Understanding Aperture is crucial to become a successful photographer and once you master this aspect of your lenses you will becomes more skilled and intuitive at fine tuning your photography.


Comments/Questions

Sunday, April 24, 2016

How to Make Your Camera Battery Last Longer

Most cameras these days can take quite a few photos on a single charge, but this week I am going to share some tips for getting more life and more shots out of the camera’s battery.

1.) GPS - This is a unique feature that a lot of new cameras have these days, but unless you need to tag your location during a shoot, keep this item off. In the course of a day, GPS can drain up to 20% on your battery.

2.) WiFi - Again this is another neat feature to have on a newer model camera, but unless you need to actually use it, keep it off. The last thing you need your camera doing during a shoot is constantly hunting for WiFi networks.


 3.) Sleep Mode - This is a nice item that is on most camera’s menus. Setting the sleep mode to the lowest time possible will allow your camera to save battery life in between shots and the camera wakes pretty much instantly when you press a button. Turning your camera on and off all the time doesn’t really extend the battery life any more than Sleep Mode but it takes a bit to boot back up and you could miss a shot.

4.) Review Time - If you are skilled at using your camera, you can set the lowest possible review time. I personally don’t use the Review at all on my cameras, and most Pros don’t either.

5.) Continuous Focus - Don’t use this if you don’t need it. It can make shooting harder if you need to recompose, but if you are shooting objects that are not moving, it just drives the focus motor constantly and drains the battery.

6.) Image Stabilization - This feature is very handy at have in your camera system at times, but if shooting on a tripod, it can actually impose movement where there should be none.


7.) Live View - Live view is one of the biggest battery drains on a camera system. The viewfinder is there for a reason, photographers got by for centuries without Live View.

8.) Silent Mode - If you don’t need it for the shooting you are doing, turn it off. My EOS 6D has two silent shooting modes and I love to use them when photographing wildlife as even the newest cameras have some clacking when taking photos. If I am shooting a car show or portraits, I turn it off to save battery life.

9.) Built-in Flash - I am not even sure why any cameras come with this these days because they are a huge battery hog, their performance is crap, so why bother put them on cameras to begin with?

10.) In Camera Post Processing - Again, not sure why cameras even have this as you can do a way better job with Lightroom or Photoshop.

11.) Focus Beep - It does not consume a huge amount of battery life but adds up over time and the beeps are annoying anyways.

12.) Light Optimizer and Noise Reduction - Again, not sure why either of these are in cameras to begin with and you can do a better job in your post production software.

13.) RAW + JPG - I know some people like having this ability but you are writing double images every time you press the shutter so you know this is sucking up memory.

Once you’ve turned these all off, you should see anywhere from a 20% even upwards of 40% increase in battery life and total shots you can take per charge.

Comments/Questions

Sunday, April 10, 2016

Back Button Focus

This week I want to talk about a better way to use your AutoFocus on your camera. By default you already know that pressing your shutter button halfway down is how you get your AF lock. The problem is, if you release your shutter, your camera then needs to reacquire focus when you press the button down again. There is an easier way to get your focus and keep it and that method is called Back Button Focus.


The button in this shot circled in white is the one I like to use for BBF on my EOS 6D

Back Button Focus is when you program your camera in the menu to use a button on the back of the body to achieve focus instead of the shutter button. The advantage of this is you don’t lose your previous focus lock when you release the shutter button and then have to reacquire it again to take your next shot. Canon was the first camera builder to add BBF to their bodies back in 1989 and every camera has had it since that time.

To set up BBF on your Canon camera, go into the menu and look for “Metering Start/Meter+AF Start, which I know sounds confusing but that is the option you want. Most photographers that use BBF like myself will us the AF Lock button on the back of the camera. I switched to BBF about a year ago and I personally would not go back to using the shutter button and most pros will tell you the same.

On a Nikon it’s a bit more straight forward in the menu but varies from model to model, but you want to use the AE-L, AF-L button on the back for your BBF, yeah that button that you never use. Now that you know how to set up and use Back Button Focus, give it a try I think once you get used to it you will like it better than using the shutter button.


Comments/Questions

Sunday, March 20, 2016

Do NOT Shoot for Free "Exposure"

One of the things that photographers get asked a lot is “Can I use your photographs for free and give you “exposure”?

This is always a bad idea and I understand that as a new photographer starting out, you might think, “Why not, I want to becomes known”?

The reason you should NOT let people or especially companies use your work for free “exposure” is it hurts the market for every photographer that is out there trying to make a living in this chosen profession.


One of my photos I had a company ask if they could use for free

A lot of times, the client wanting to use your photos will used the excuse that they cannot afford to pay you for your work, which is usually a lie, they just want something for nothing. I remember recently reading an article by David Carson, who is a professional photographer for the St. Louis Post-Dispatch where CBS News actually asked him if they could use some of his incredible photos for free.

David, as you can imagine, was insulted. CBS News is a multi-billion dollar company and they didn’t want to pay him for his work, they expected him to let them use his photographs for free for “exposure”.

It’s so funny how people and companies think photographers should work for free, but they would not do the same thing if you asked them to work for free or “spec”. A few months back I watched a great video put out by an ad agency named Zulu Alpha Kilo titled “Say No to Spec”. This morning I saw the same video re-shared by LightStalking so I thought it would make a good subject for this week’s blog post. You can view their video here.

So, remember, next time someone asks you to work for free “exposure” or spec, just tell them No and send them the link to this video.

Comments/Questions